This article is written for and published on SitePoint.
In a previous article, we went through the installation of Jenkins and prepared everything to get started. We will continue in this article by actually preparing our project. If you have a Jenkins setup ready from before, no need to go through the previous part – you can follow along with this one quite nicely.
Prepare composer
We are going to prepare our project first. We could use the project supplied by Sebastian Bergmann, but it’s rather a basic project and will run without problems in Jenkins. In this article, we will be using a different repository in which we will have to overcome some hurdles. We will be using a fork of Jumph as our basis.
First and foremost, we have to make sure that we have tools like PHPUnit and PHP-CodeSniffer available. We can do this in two different ways. Either we install the packages on our Jenkins server through Pear or Composer globally, or we define the dependencies in our composer.json file. I decided to go with the latter method, so we can easily control the version of these tools on our own local machine as well as on Jenkins. So we start by adding the following lines to the composer.json file and run composer update.
"require-dev": {
    "squizlabs/php_codesniffer": "~1.5.*",
    "phpmd/phpmd": "~2.1.*",
    "sebastian/phpcpd": "~2.0.*",
    "pdepend/pdepend": "~2.0.*",
    "phploc/phploc": "~2.0.*",
    "phpunit/phpunit": "~4.3.*",
    "theseer/phpdox": "~0.7.*",
},
If you want to know more about what each package does, have a look at Bruno’s article about PHP QA tools.
Prepare Ant
On our Jenkins server, we will be using Ant. So in case Ant is not yet installed on your server, make sure it is by running the following command.
sudo apt-get install ant
Ant helps you automate the software build process. You define tasks, called targets, in the configuration file. Ant will read this file and perform the appropriate action. You can define dependencies to indicate in which order Ant should perform these tasks. The configuration file is the so called build.xml file. We are going to add this to our project, so Ant can perform these tasks on our Jenkins server. We are going to use the template provided by Sebastian Bergmann which can be found here. We add this to the root of our project.
To run Ant, you can kick off ant build on the command line. This means that Ant will run the build target. If no parameter is given, Ant will run the target as indicated in the configuration as default, which in this case is also build.
Let’s take a closer look at the build target.
<target name="build" depends="prepare,lint,phploc-ci,pdepend,phpmd-ci,phpcs-ci,phpcpd-ci,phpunit,phpdox" description=""/>
The target is empty, however, it depends on a lot of other targets. It will first run the prepare target and then continue with the lint target until every target has been run. Let’s have a look at the phploc-ci target for example.
<target name="phploc-ci" depends="prepare" description="Measure project size using PHPLOC and log result in CSV and XML format. Intended for usage within a continuous integration environment.">
    <exec executable="${toolsdir}phploc">
        <arg value="--count-tests"/>
        <arg value="--log-csv"/>
        <arg path="${basedir}/build/logs/phploc.csv"/>
        <arg value="--log-xml"/>
        <arg path="${basedir}/build/logs/phploc.xml"/>
        <arg path="${basedir}/src"/>
        <arg path="${basedir}/tests"/>
    </exec>
</target>
This target is fairly easy to understand. You will notice it depends on the prepare target. Since that was already run by the build target, it won’t run again. Then we get the executable, which is phploc, which will be executed by Ant. You installed this earlier with Composer. Lastly, we will see the PHPLOC specific arguments. Ant will run the following command line input based on this target configuration.
phploc --count-tests --log-csv /build/logs/phploc.csv --log-xml /build/logs/phploc.xml /src /tests
The ${toolsdir} and ${basedir} are 2 variables. Depending on how they are configured, they might have an effect on the overall command line output
As indicated above, if you only wanted to trigger this target, you should run ant phploc-ci on the command line.
Notice that this PHPLOC command will output a phploc.csv file and a phploc.xml file. The plugins installed in Jenkins earlier will read these files and convert them to graphs, for example. In the next article we will dive deeper into this topic.
If you look through the whole build.xml file, you will notice that it’s depending on 3 other separate config files for certain tools; build/phpmd.xml, build/phpdox.xml and build/phpunit.xml. These configuration files are requested by the actual tools. To find out more, look at their respective docs.
Note that phpunit.xml is heavily inspired by the original phpunit.xml.dist file from Symfony2 since we are dealing with a Symfony2 project.
Changing the build.xml file
So, are we done? Unfortunately, not yet. The build.xml file is very generic and not completely suited for our project. First we need to define where tools like PHPUnit can be found. Our composer installed these automatically in the bin directory in the root of our project. We need to change the toolsdir property to the correct value.
<property name="toolsdir" value="bin/" />
We can also clean up several commands. The current build.xml file defines that we on one hand have a src directory and on the other hand a tests directory. Since Symfony2 includes tests in the src directory, we can remove all paths to the tests directory like this example.
<arg path="${basedir}/tests"/>
Although it’s not required, I prefer to keep everything as clean as possible so it matches our project correctly.
Lastly, the current configuration for PHPDox as indicated in the build.xml file while writing this article does not work with the latest version in my case. I changed the target like below, so it correctly reads our configuration file.
<target name="phpdox" depends="phploc-ci,phpcs-ci,phpmd-ci" description="Generate project documentation using phpDox">
  <exec executable="${toolsdir}phpdox">
   <arg value="--file" />
   <arg value="${basedir}/build/phpdox.xml" />
  </exec>
 </target>
Creating new targets
Everything has been set up to make sure all our QA tools will run as expected. However, our project is just a bit more complicated. If you analyzed the repository, you will notice that dependencies are regulated by Composer and Bower. Since it’s a Symfony project, we will also need a default parameters.yml file. We need to deal with these requirements to be able to set up the project correctly on Jenkins.
Let’s start off with the parameters.yml file. We can work with the default content of parameters.yml.dist, so we are just going to copy that file. We start by creating a new target named copy-parameters which executes the cp command.
 <target name="copy-parameters" description="Copy parameters.yml file">
  <exec executable="cp" failonerror="true">
   <arg path="app/config/parameters.yml.dist" />
   <arg path="app/config/parameters.yml" />
  </exec>
 </target>
Next up are Composer and Bower. I decided to install these globally on the Jenkins server by executing the following commands.
curl -sS https://getcomposer.org/installer | php
sudo mv composer.phar /usr/bin/composer

sudo apt-get install nodejs
sudo apt-get install npm
sudo npm install -g bower
sudo ln -s /usr/bin/nodejs /usr/bin/node #This is needed on certain linux distro's.
[Ed: Note that if you’re running all this in a VM hosted on Windows, BowerPHP will be a much better option than Bower.]
Now lets create a target for Composer.
<target name="composer" description="Installing composer dependencies">
 <exec executable="composer" failonerror="true">
  <arg value="install" />
  <arg value="--dev" />
  <arg value="--prefer-dist" />
  <arg value="--no-progress" />

  <env key="SYMFONY_ENV" value="test"/>
 </exec>
</target>
It’s important to set SYMFONY_ENV to test so symfony knows it has to clear its test cache directory.
Let’s continue with Bower.
<target name="bower" description="Installing bower dependencies">
 <exec executable="bower" failonerror="true">
  <arg value="install" />
 </exec>
</target>
The final thing we need to do, is to make sure these targets are executed. So we change the build target and add the 3 newly created targets in the order we want to execute them.
<target name="build" depends="prepare,copy-parameters,bower,composer,lint,phploc-ci,pdepend,phpmd-ci,phpcs-ci,phpcpd-ci,phpunit,phpdox" description=""/>
Git
The last thing we need to do is to prepare our .gitignore file. If you ever want to run an Ant target on your local machine, your build directory will be filled with log files which you don’t want to commit to your repository. So we add the following lines to the .gitignore file.
# build
!build/phpmd.xml
!build/phpunit.xml
!build/phpdox.xml
build/*
Perhaps you got a little confused by all the changes we made. For your convenience, here is a direct link to the commit with all the changes we described above.
Create the project in Jenkins
Our project is ready. Let’s head back to Jenkins and configure it. This will be the easiest part in this article.
Since our project is located on Github, I suggest you install the Github plugin within Jenkins. If you are using your own git server, you can just install the regular Git plugin. If you are uncertain how to install a plugin, check the previous article.
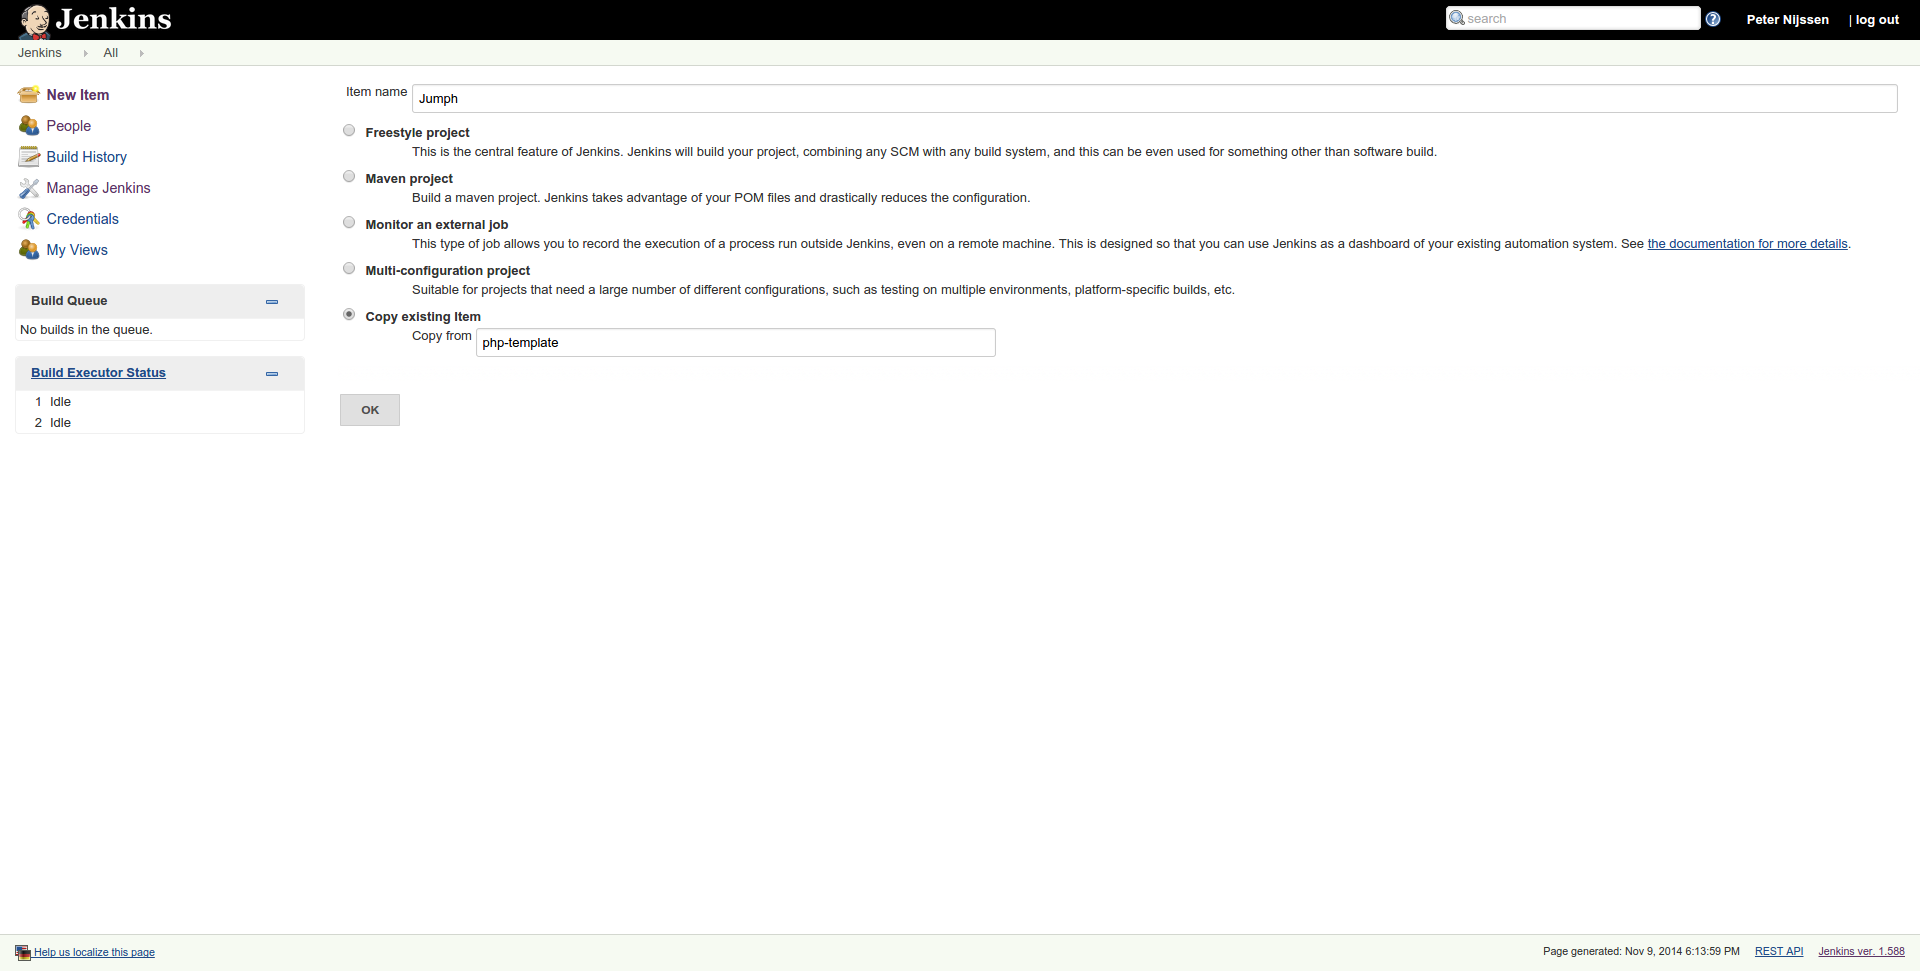
When you return to the overview, you have to click new item in the left menu. As item name, we fill in Jumph. Next, we choose the option copy existing item and fill in php-template as the project to copy from.
We will immediately be taken to the configuration page of this project. First we uncheck Disable build so our build will be enabled on save. Within the Github project input field, we fill in the URL to the Github project.
The last thing we have to do is choose the source management. In our case, this is git. Next, you have to fill in the repository link. If you use the HTTPS link, you don’t have to provide any additional credentials. We can decide which branches should be build, but since we only have a master branch, we will leave it as it is.
The configuration is done – it’s so easy because we used a predefined template. If you scroll down, you will exactly see what the template configured for us. Don’t forget to save your configuration before continuing.
Start a build
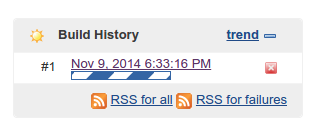
If you followed all the steps so far, you should now be able to start a build. You can start a build by clicking build now in the left side menu of a project. You will notice at the bottom left table that a build appears.
If you click on the build itself, you will get a new side menu with options for this particular build. Click on console output to see exactly what’s going on. In my case, the first build failed due to missing some PHP extensions.
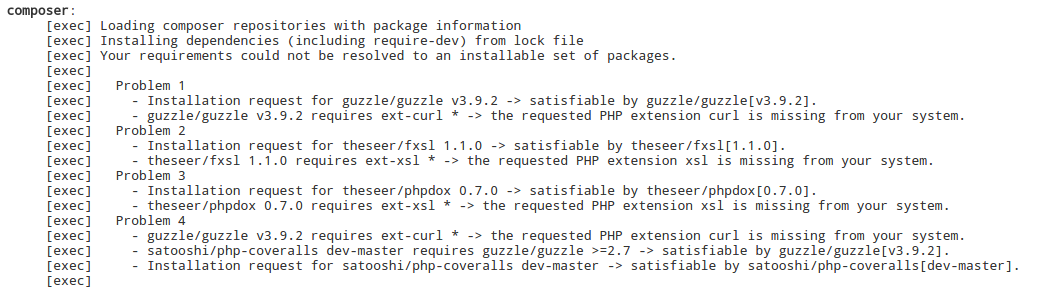
The console output comes in very handy for finding out why your project is failing. In my case, I just had to run sudo apt-get install php5-curl php5-xsl php5-sqlite php5-xdebug to install some needed packages. It took me a couple of builds to figure out what was missing, but with the console output, it’s easy to figure out what is going wrong. In the end, this is what my build history looks like.
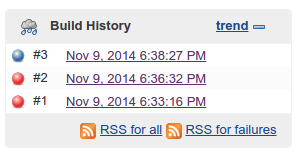
Red means the build has failed, where blue means the build was successful. A failure can mean something went wrong with the configuration as we saw before, but it could also mean that unit tests have failed. If you open up your build.xml file again, you will notice that some targets got an attribute named failonerror which is set to true. If for some reason, that target fails, Ant will automatically stop and will report the build as broken.
Perhaps you expected a green ball instead of a blue ball when a build succeeds. There is a plugin available to show green balls instead of blue ones.
Conclusion
In this article, we worked our way to a successful build. We had to prepare our project and create a job within Jenkins. Finally we had to debug our first couple of builds since we forgot to install some libraries.
In the next part, we will take a look at all the results Jenkins gives back.